I was recently tasked with creating a simple Web Service (WS) application to serve as a training tool, and the problems that I encountered can be considered cruel and unusual for any pentester. The most idiotic issue came from using Visual Studio 2005 to publish the WS in IIS 6. When I used the debugger in Visual Studio (VS) to run the WS app, the app worked fine. But when I tried to publish the WS app in the
wwwroot of IIS, the stupid ASP keeps throwing me errors.
I believe that no one should be made to suffer through this again, so I'm going to summarize what I did for
*posterity*.
Before I can start, we're going to need a baseline. I was using a default installation of Windows 2003 Server R2 Standard Edition with IIS 6, and a default installation of Visual Studio 2005 Professional Edition without SP1. The baseline WS app will be the default "
Hello World" Web Service Web Site from Visual Studio.
1. To create the Web Site in Visual Studio, go to
File -> New -> Web Site. Choose
ASP.NET Web Service in the dialog box.
I'm going to name and save the project as per the following for brevity in this post:
C:\Documents and Settings\Administrator\My Documents\Visual Studio 2005\WebSites\Sample1
You may notice that the
Web.config file is missing from VS's
Solution Explorer (right windows), but it'll be created when you start debugging.
2. Then in VS, select
Debug -> Start Debugging. and choose
Add a new Web.config file with debugging enabled. in the next dialog box. A new browser is started showing the Web Service directory and you can start playing with the Web Service without any problem.
Notice the
port number in the URL, this is not the default IIS 6 web server.
3. Now we will try to publish the WS. In VS, select
Build -> Build Web Site. You should get the
Build succeeded status. Then select
Build -> Publish Web Site. I'm going to publish the WS app in the root directory of IIS:
C:\Inetpub\wwwroot\Sample1.
You should get the
Publish succeeded status. Here comes the
nightmare!!!
4. On the local machine, open the WS's URL in a new browser:
http://localhost/Sample1/Service.asmx
You will get the following error:
Server Error in '/' Application.
Parser Error
Description: An error occurred during the parsing of a resource required to service this request. Please review the following specific parse error details and modify your source file appropriately.
Parser Error Message: Could not create type 'Service'.
Source Error:
Line 1: <%@ WebService Language="C#" CodeBehind="~/App_Code/Service.cs" Class="Service" %>
Source File: c:\inetpub\wwwroot\Sample1\Service.asmx Line: 1
Version Information: Microsoft .NET Framework Version:1.1.4322.2300; ASP.NET Version:1.1.4322.2300
5. You need to make 2 changes to solve this error. The first step is to copy the
bin directory from your project directory into IIS's web root. Look at your IIS's wwwroot directory structure:
C:\
+- Inetpub
+- AdminScripts
+- wwwroot
+- aspnet_client
+- Sample1
+- bin
+- App_Code.compiled
+- App_Code.dll
You need to put all your "
App_Code" and "
bin" directories into the
wwwroot directory instead of the published project directory (sub-directory where the
asmx file resides). For some unknown reasons, Visual Studio 2005 do not move or copy them from the project directory for you automatically.
Your new IIS wwwroot directory structure should look like this:
C:\
+- Inetpub
+- AdminScripts
+- wwwroot
+- aspnet_client
+- bin
+- App_Code.compiled
+- App_Code.dll
+- Sample1
+- bin
+- App_Code.compiled
+- App_Code.dll
You should still get the same error if you reload the browser.
5. The second step is changing the .NET version in IIS 6. IIS 6 is trying to run code compiled in .NET 2 with .NET 1. In Windows, go to
Administrative Tools -> Internet Information Services (IIS) Manager. In IIS Manager, expand
LOCALSERVER(local computer) -> Web Sites -> Default Web Site.
Right-click
Default Web Site and select
Properties.In the dialog box, select the
ASP.NET tab. Change the ASP.NET version from
1.1.4322 to
2.0.50727 and click
OK.
6. Reload the local browser. You should see the following error:
Server Error in '/' Application.
Configuration Error
Description: An error occurred during the processing of a configuration file required to service this request. Please review the specific error details below and modify your configuration file appropriately.
Parser Error Message: It is an error to use a section registered as allowDefinition='MachineToApplication' beyond application level. This error can be caused by a virtual directory not being configured as an application in IIS.
Source Error:
Line 24: ASP.NET to identify an incoming user.
Line 25: -->
Line 26:
Line 27: <!--
Line 28: The section enables configuration
Source File: c:\inetpub\wwwroot\sample1\web.config Line: 26
Version Information: Microsoft .NET Framework Version:2.0.50727.42; ASP.NET Version:2.0.50727.42
On a remote browser, you should see the following error when you open the WS's URL (assuming 192.168.1.185 is the WS server's IP):
http://192.168.1.185/Sample1/Service.asmx
Server Error in '/' Application.
Runtime Error
Description: An application error occurred on the server. The current custom error settings for this application prevent the details of the application error from being viewed remotely (for security reasons). It could, however, be viewed by browsers running on the local server machine.
Details: To enable the details of this specific error message to be viewable on remote machines, please create a <customErrors> tag within a "web.config" configuration file located in the root directory of the current web application. This <customErrors> tag should then have its "mode" attribute set to "Off".
<!-- Web.Config Configuration File -->
<configuration>
<system.web>
<customErrors mode="Off"/>
</system.web>
</configuration>
Notes: The current error page you are seeing can be replaced by a custom error page by modifying the "defaultRedirect" attribute of the application's <customErrors> configuration tag to point to a custom error page URL.
<!-- Web.Config Configuration File -->
<configuration>
<system.web>
<customErrors mode="RemoteOnly" defaultRedirect="mycustompage.htm"/>
</system.web>
</configuration>
7. You need to create an application in IIS 6 with the same name as the virtual directory. From IIS Manager, expand
LOCALSERVER(local computer) -> Web Sites -> Default Web Site -> Sample1.
Right-click
Sample1 and select
Properties.In the dialog box, select the
Directory tab. Click on the
Create button and click
OK.
8. You should find that the WS app is working normally on the local machine.
9. On a remote machine, it looks like the WS is working.
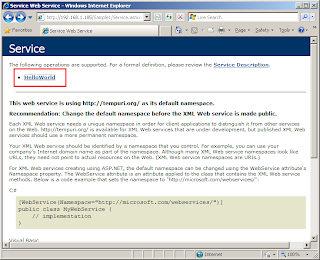
But you will see the following error message when you select the
HelloWorld WS:
The test form is only available for requests from the local machine.
10. Since .NET Framework 1.1, HTTP GET and HTTP POST are both disabled by default. You need to enable them in the
Web.config file. From VS, insert the following code into
Web.config and re-publish the Web Site as shown in step 3:
<webServices>
<protocols>
<add name="HttpGet"/>
<add name="HttpPost"/>
</protocols>
</webServices>
Note that the code must be inserted inside the <system.web> tags like so:
<configuration>
<system.web>
<webServices>
<protocols>
<add name="HttpGet"/>
<add name="HttpPost"/>
</protocols>
</webServices>
</system.web>
</configuration>
11. You should find that the WS app is working normally on the remote machine now.
12. If you're going to release this WS app into the production environment, you probably should disable
Debugging for your app. From VS, find the following line in
Web.config:
<compilation debug="true"/>
Set
debug to
false and re-publish the Web Site as shown in step 3:
<compilation debug="false"/>
--- The End ---


